Quick Deployment Guide
Step-by-step instructions for unboxing and racking the unit, connecting it to your network, accessing the unit, and configuring essential system settings.
Unboxing and Racking
- Unpack the Netmon unit carefully from the shipping box, ensuring you don't accidentally damage any components. Keep the packaging materials in case you need to return the unit in the future.
- Install the provided rails into your server rack. Follow the manufacturer's instructions for proper rail installation. If you are unsure, consult the rack manual or contact the manufacturer.
- Slide the Netmon unit into the server rack, aligning it with the rails. Ensure that the unit is secure and level within the rack.
- Use the provided screws to fasten the Netmon unit securely in the rack. Double-check that the screws are tightened appropriately to avoid any potential damage to the unit.
- You will find a sticker on the appliance with a MAC address and the default system password. Please make note of this password at this time.
Physical Networking
- Connect an Ethernet cable from the Netmon unit's Interface 1 port to an available port on your network switch or router.
This connection will provide the unit with network access. - Connect a separate Ethernet cable from the Netmon unit's IPMI (Intelligent Platform Management Interface) or OOBM (Out-of-Band Management) port to another available port on your network switch or router.
This connection enables emergency and recovery management of the unit. - Optional — At this time, you may also connect an Ethernet cable from the Netmon (any available port) to the SPAN or MIRROR port of your network switch. This will allow real-time traffic analysis.
Configure Port Mirroring on Your Switch
Select your switch vendor below for step-by-step CLI instructions on configuring a port mirror session that sends a copy of your network traffic to the Netmon appliance.
Configure a Switched Port Analyzer (SPAN) session on your Cisco switch to mirror production traffic directly to your Netmon appliance for real-time network analysis.
Log into your Cisco switch's CLI to configure the local port mirror.
Step 1 — Enter Global Configuration Mode
Access the configuration terminal to begin building your SPAN session.
Step 2 — Define the Source (Traffic to Monitor)
Specify a session number (e.g., 1) and the production port(s) or VLAN(s) you want to monitor. You can add multiple source ports or specify a range. Capture rx (incoming), tx (outgoing), or both.
To monitor an entire VLAN, replace interface ethernet <slot/port> with vlan <vlan-id>
Step 3 — Define the Destination (Netmon Connection)
Specify the switch port where your Netmon appliance is physically connected.
Step 4 — Activate the Session
Ensure the monitoring session is enabled and actively forwarding traffic.
This step may not be required on Cisco Catalyst switches where the session starts automatically.
Step 5 — Verify the Configuration
Exit configuration mode and confirm the session state is marked as "up."
Once the switch is actively sending mirrored traffic, configure Netmon to ingest and analyze the packets.
Navigate to System > System Settings > Network Interfaces. Select the interface connected to your SPAN port, set Configure As: Sniffer (manual), then click Submit.
This may take a minute to complete.

Network Interfaces — Configure As: Sniffer (manual)
Accessing Netmon
If you are connected to the same subnet as Netmon, you may attempt to utilize mDNS by connecting to:
Netmon can also be accessed by connecting to its IP address, from your DHCP server, using:
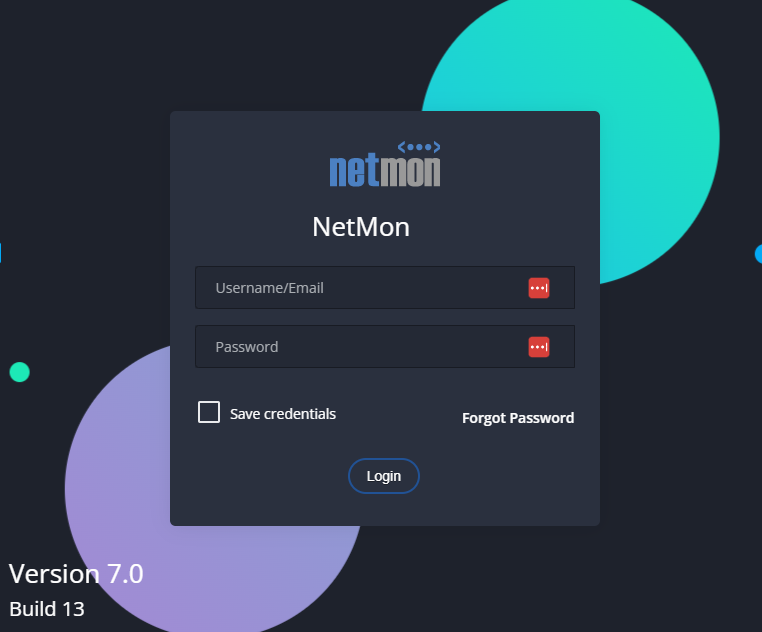
Netmon login screen — Version 7.0 / Build 13
Setup the Admin Account
Using the Left Navigation Menu, go to System > Users and Permissions to configure the admin account settings.
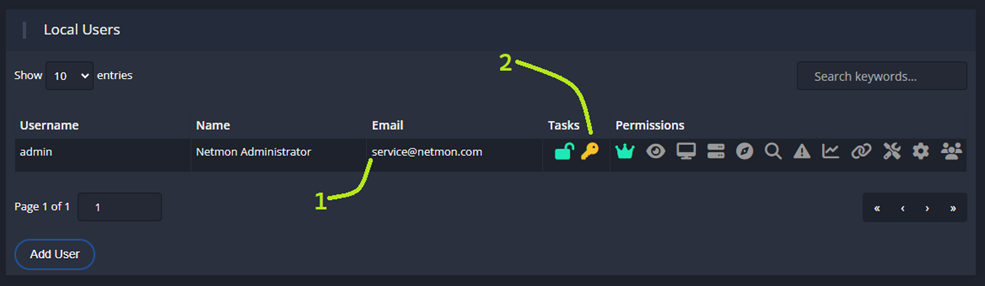
Local Users — System > Users and Permissions
- 1 Set the admin email address, which will be used to verify SMTP configuration.
- 2 Reset the default admin password by clicking the key icon, and entering a new, secure password.
Configure Netmon System Settings
Network Interfaces
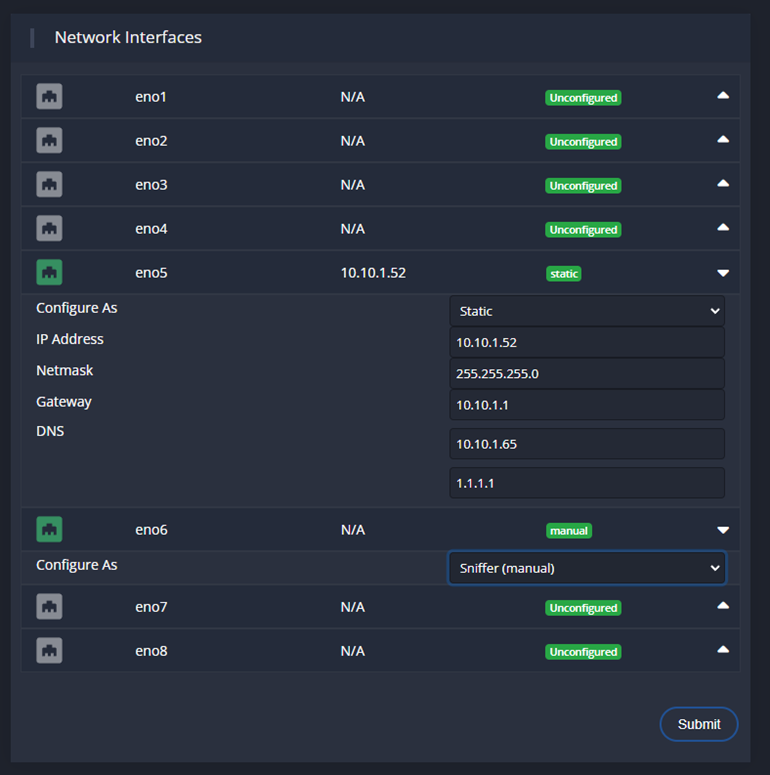
Network Interfaces — System Settings
- Static IP: Configure all settings yourself.
- DHCP: Discover from DHCP server.
- Sniffer: This interface will be connected to a SPAN/Mirror port.
- Unconfigured: No configuration will be applied at boot.
Click Submit to save your changes.
SMTP Configuration
Enter the required SMTP server information such as the server address, port, and authentication credentials.

SMTP Configuration — System Settings
Time and Timezone
Set the most appropriate timezone for your location. Configure the NTP server settings or, set the time manually if desired.
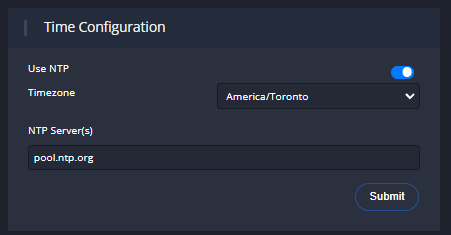
Time Configuration — System Settings
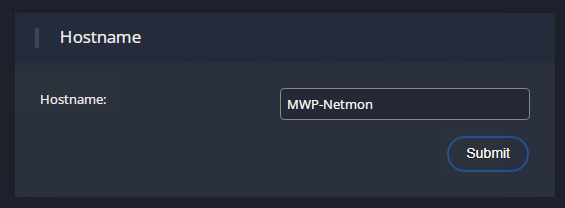
Hostname
Enter a suitable hostname for your Netmon. Click Submit to apply.
Hostname — System Settings
Backup Private Key

Backup — System Settings
PRIVATE_KEY from the appliance. This key is the master decryption key for the Netmon database — please take care to store it securely, as it is necessary to completely restore from backups.