
Adding & Importing Devices v7.0.20
Bring devices under monitoring three ways — automatic discovery, self-announcing Windows agents, and the manual Add Device wizard — all from the Device Import page.
Device Import is the front door of the inventory: discovery queues what it finds here, Windows agents announce themselves here, and the Add Device wizard lives here. The page has two layers — the settings that drive discovery at the top (credentials and network ranges), and the pending-device queue beneath.
Credentials first
Start with the Credentials table: the read credentials discovery and polling will use — SNMP v1/v2c community strings and SNMP v3 users. Create these before the network ranges, because a range is configured with the credentials discovery should try against it; the credential has to exist before it can be assigned.
When discovery meets a host that answers SNMP with one of a range’s credentials, the pending entry arrives knowing its polling method and credential — importing it is one click, with nothing to type.
Use read-only credentials. Netmon never writes via SNMP; granting it write communities buys nothing and widens the blast radius if a credential leaks.
Monitored network ranges
A monitored network range tells Netmon which addresses are yours. Each range has a label, a start and end address, the credentials to try, and two switches:
- Auto Discovery — actively probe the range for new hosts and queue finds as pending devices.
- Include Credential-less Devices — widens discovery to hosts that answer ping but neither SNMP nor the agent, queuing them as pending devices (with no profile) so they are not missed. It does not scan for open TCP ports, despite the name of the underlying setting (
enable_portscanin the API). (The range editor labels this same switch Discover non-SNMP/Agent Devices.)
The appliance also learns passively: its ARP probe notices new hardware addresses on connected segments. Ranges focus that attention and give the results a network label — pending devices arrive grouped by the range that produced them (the Network column).
Add a range with the + control on the Monitored Network Ranges table; ranges can be edited or removed at any time without affecting devices already imported.
The pending queue
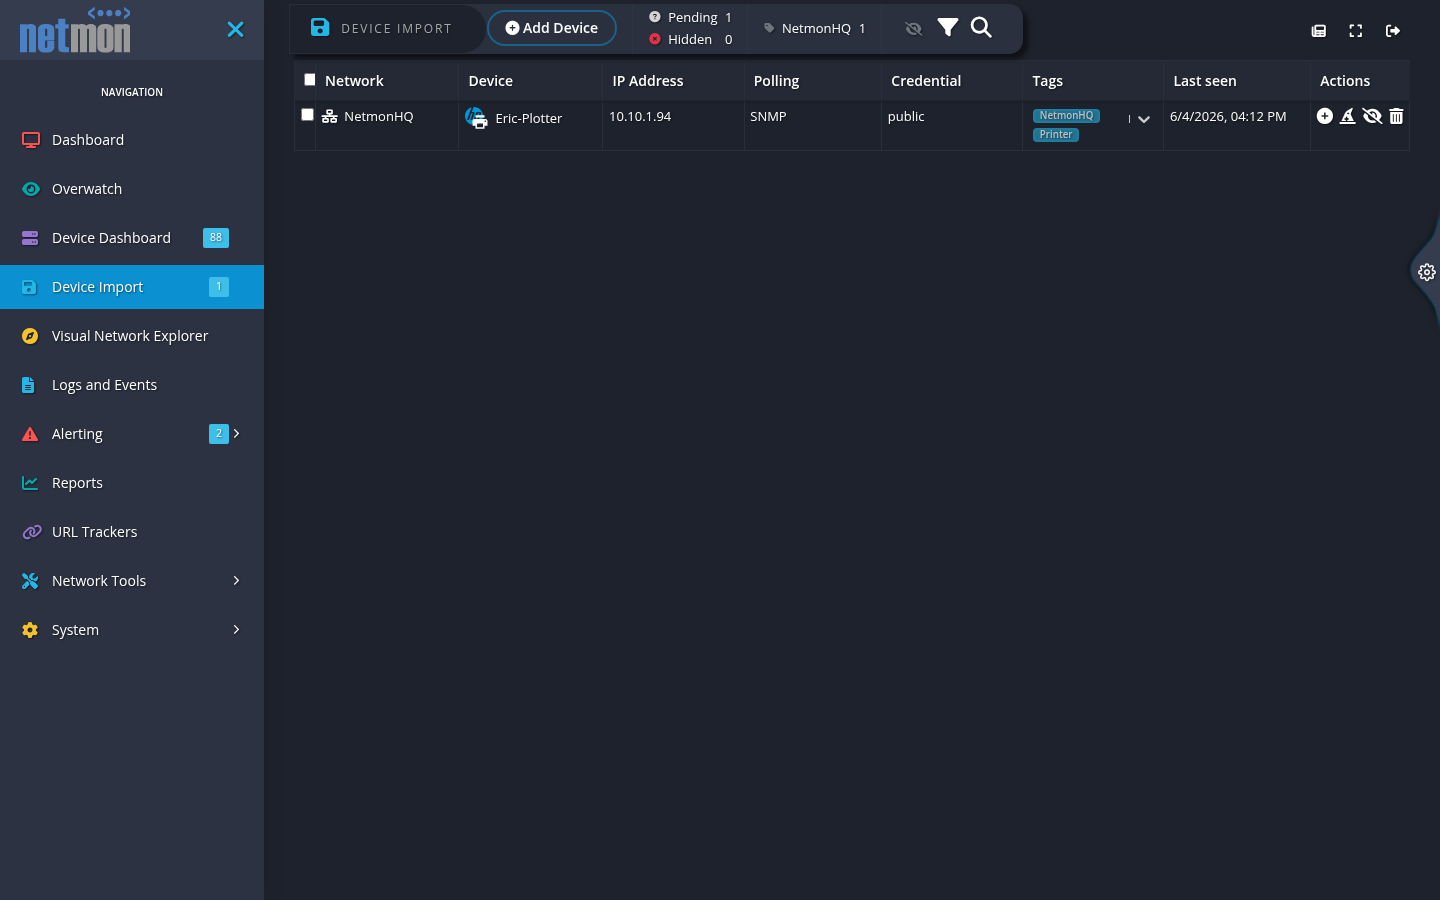
Every candidate device waits here for a human decision. Each row shows what discovery learned — network, name, address, polling method, credential, and when it was last seen — plus editable Tags chips, so you can tag a device before it enters the inventory (and before tag-driven alert routing notices it).
Per-row actions:
- Import (the plus icon) — promote the row to a monitored device. Polling begins within moments.
- Hide (the eye icon) — dismiss a row you never intend to monitor (a neighbor’s DHCP client, a guest laptop). Hidden rows stop nagging but are recoverable from the Hidden counter.
- Delete (the trash-can icon) — drop the row entirely; discovery may re-queue the host if it is seen again.
Select several rows with the checkboxes to import a batch in one motion.
Windows hosts running the Netmon Agent appear in this same queue with an agent badge, carrying their hostname, agent version, and operating system — the enrollment workflows are covered in The Windows Agent.
Adding a device by hand
Add Device opens a three-step wizard for equipment discovery can’t reach (a far side of a WAN, a firewalled management address) or that you simply want to enter deliberately.
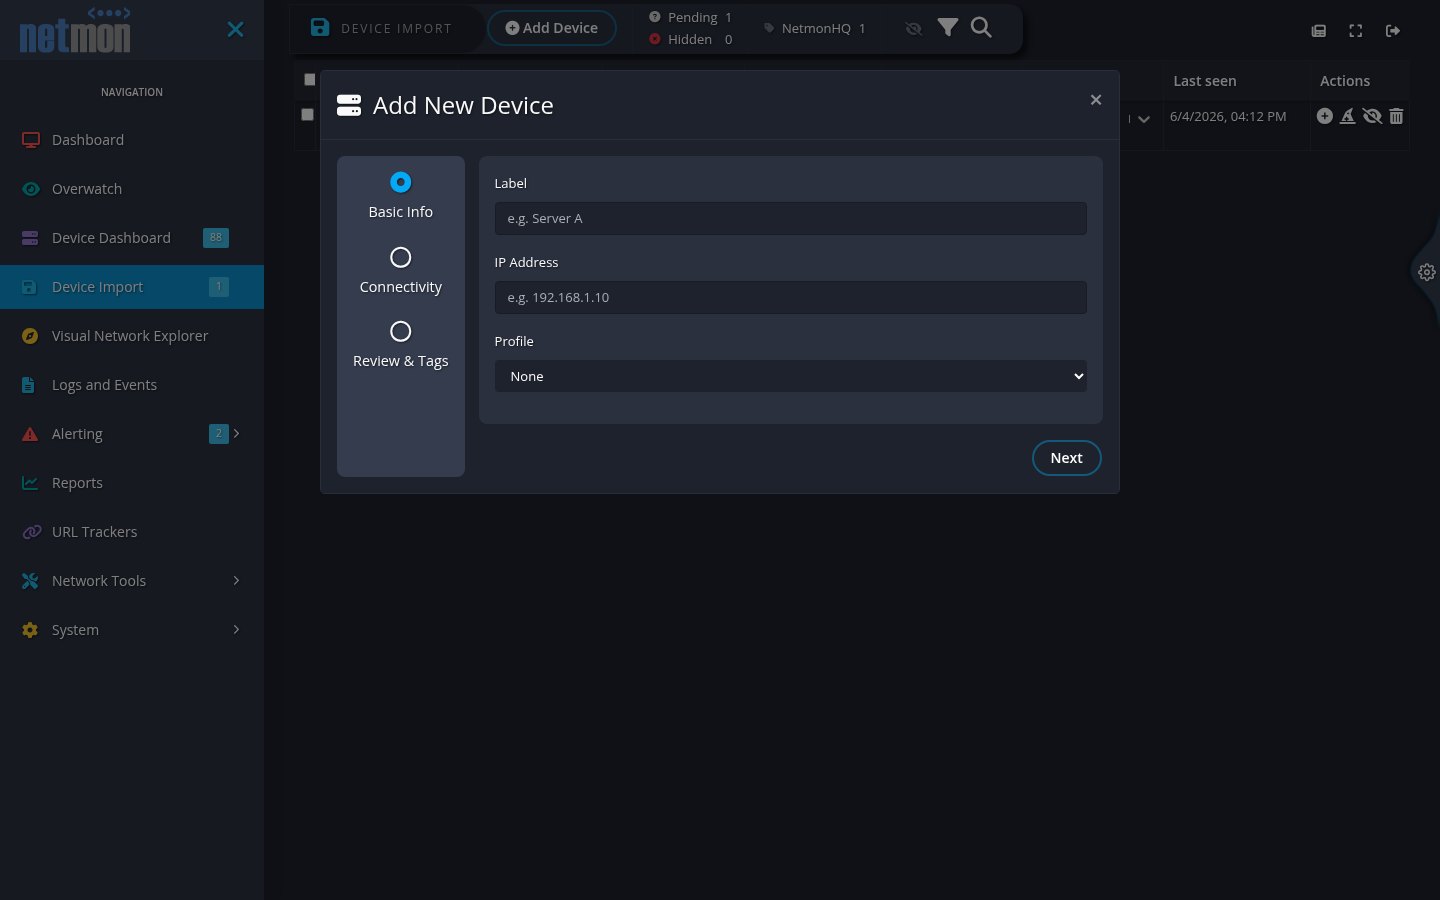
- Basic Info — a display label, the IP address, and the profile. The profile list spans the common landscape — routers (Cisco, Fortigate, Sonicwall, UniFi, Checkpoint, generic), switches (Aruba, Catalyst, Dell, HPE, Juniper, UniFi), access points, printers, NAS units, UPSes (APC, CyberPower, Tripplite, generic), VMware ESXi, Linux via Net-SNMP, environment sensors, and the Netmon Agent profiles for Windows and Hyper-V hosts. Pick the closest match; Basic SNMP and None are honest fallbacks.
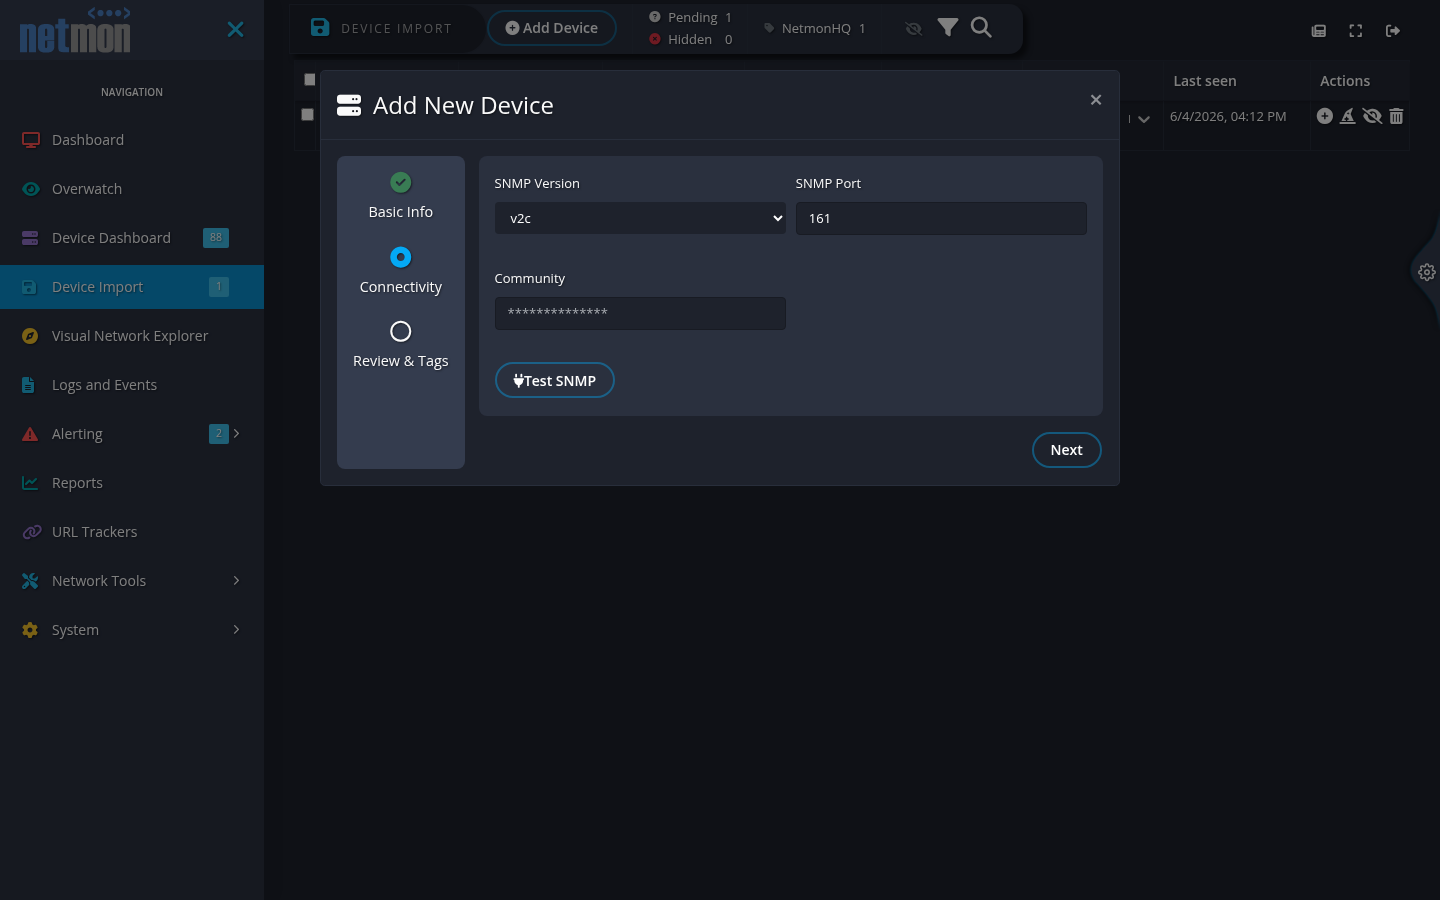
- Connectivity — the questions the chosen profile needs answered. For SNMP profiles: version (v1, v2c, or v3), port, and credentials, with a Test SNMP button that verifies reachability before you commit. Agent profiles have no connectivity questions — the agent’s enrollment carries them (see The Windows Agent).
- Review & Tags — confirm the summary, apply tags, and create the device.
After the import
A new device starts working immediately: ICMP history begins, the device is crawled per its profile, and its sensors and interface graphs populate over the first polling cycles. Give a freshly imported device a few minutes before judging what it can see. Where it lands — the device dashboard — is the next step in this guide.