
The Windows Agent v7.0.20
Install, enroll, and manage the Netmon Agent — the Windows service that reports what SNMP cannot: services, processes, disks, installed software, hardware inventory, and the event logs, collected continuously.
SNMP describes a Windows host poorly. The Netmon Agent — a lightweight Windows service — describes it properly: services and their states, processes, logical disks and what fills them, installed software, hardware inventory, and the Windows event logs, all collected continuously and attributed to the device. One agent can report to several Netmon appliances at once, which suits managed-service and multi-site arrangements.
Installing the agent
Installers for 64-bit and ARM Windows are published by your appliance itself, under System → System Settings → Downloadables (Windows Agent). Run the installer with administrative rights on the target host; it registers the NetmonAgent service, opens the agent’s listening port (UDP 489) in Windows Firewall, and installs a small tray application for status and control. Mass deployment through your software distribution tooling works the same way — the installer runs silently with /S.
The agent’s network access control is the per-appliance key exchange, not the firewall rule: the agent only completes a session with an appliance it has enrolled with (each pairing has its own key, matched to the appliance’s source address), and silently drops everything else. The installer opens UDP 489 for all firewall profiles; if your policy requires it, scope the rule (or a network ACL) to your appliance address(es) — the installer does not do this for you.
Installation involves no keys and no prompts. Enrollment — introducing the agent to your appliance — is a separate, deliberate step, done one of three ways.
Enrollment
Check-in (the default). On the agent host, run from an elevated prompt:
NetmonAgent.exe --add-server https://your-netmon.example.comThe agent begins checking in with your appliance, and the host appears on Device Import as a pending device wearing an agent badge — hostname, agent version, and operating system attached. Import it like any pending device; on its next check-in the agent receives its security material and monitoring begins. The decision to admit a host always rests with an operator on the Netmon side.
Pre-issued token (batch and MDM deployments). An administrator with the Agent Admin permission can issue enrollment tokens in advance. Supply the token at enrollment time —
NetmonAgent.exe --add-server https://your-netmon.example.com --token <token>— and the pending-review step is skipped: the device is created immediately, pre-tagged as the token specifies. Single-use tokens spend themselves; reusable tokens suit imaging pipelines. Tokens expire on a schedule you set and can be revoked at any time.
Adoption key (the Netmon reaches out). For hosts that cannot or should not initiate contact — locked-down networks, many hosts behind one NAT address — invert the direction. On the agent host (CLI or tray):
NetmonAgent.exe --mint-keyThis prints a one-time adoption key and the agent simply listens. In the Add Device wizard, choose the agent profile, enter the host’s address and the adoption key, and your appliance contacts the agent directly and completes the exchange. Keys expire after an hour by default; a wrong key receives silence, so the mechanism cannot be probed.
However enrollment begins, the result is the same: the appliance and agent exchange per-server keys, and all subsequent communication is encrypted. The agent carries no shared factory secret — each appliance-agent pairing has its own.
The tray application
The tray icon gives the host’s operator an honest window into the agent: which Netmon servers it reports to, its enrollment state, and service controls (start, stop, restart, add or remove a server). Privileged actions prompt for Windows elevation individually — the tray runs as the signed-in user, never silently as SYSTEM.
What the agent feeds
Once enrolled, the device’s dashboard fills with the Windows material: CPU and memory gauges, the live process list, services, per-disk usage with a browsable view of what consumes space, software inventory, and event-log collection. Hyper-V hosts are recognized automatically and gain per-VM visibility. All of it alerts and reports like any other device data.
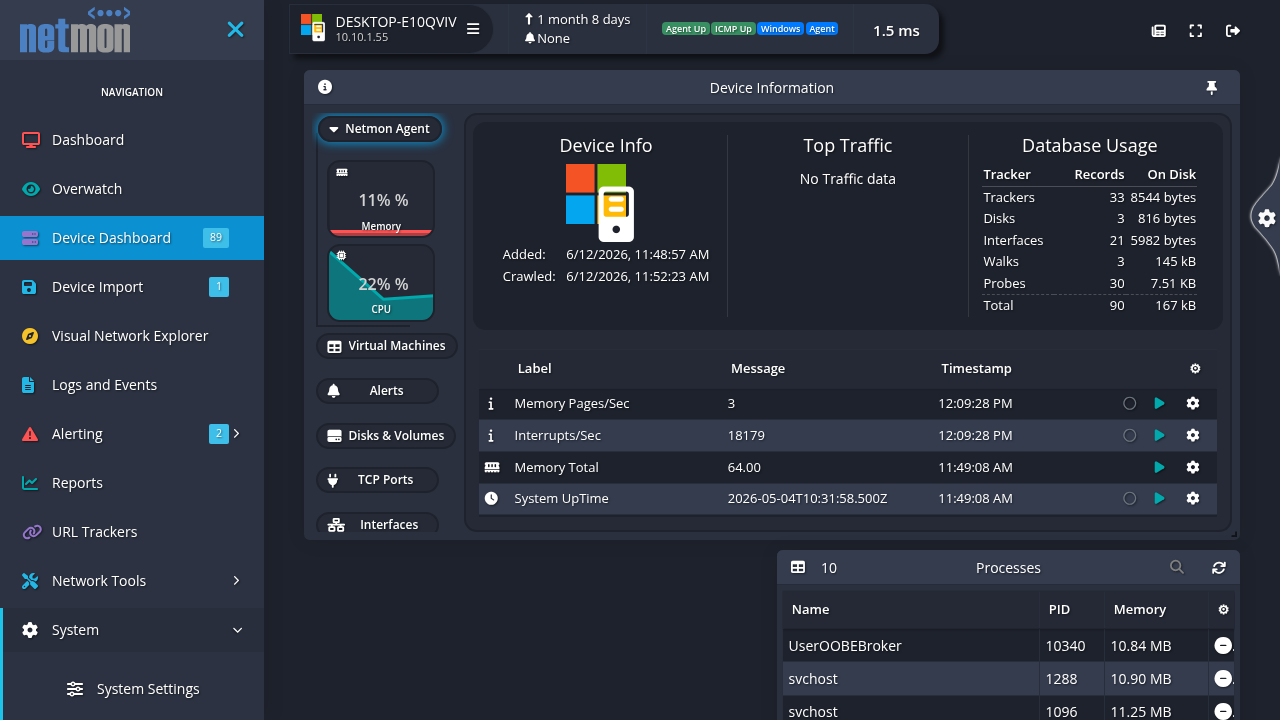
Choosing which event logs to collect
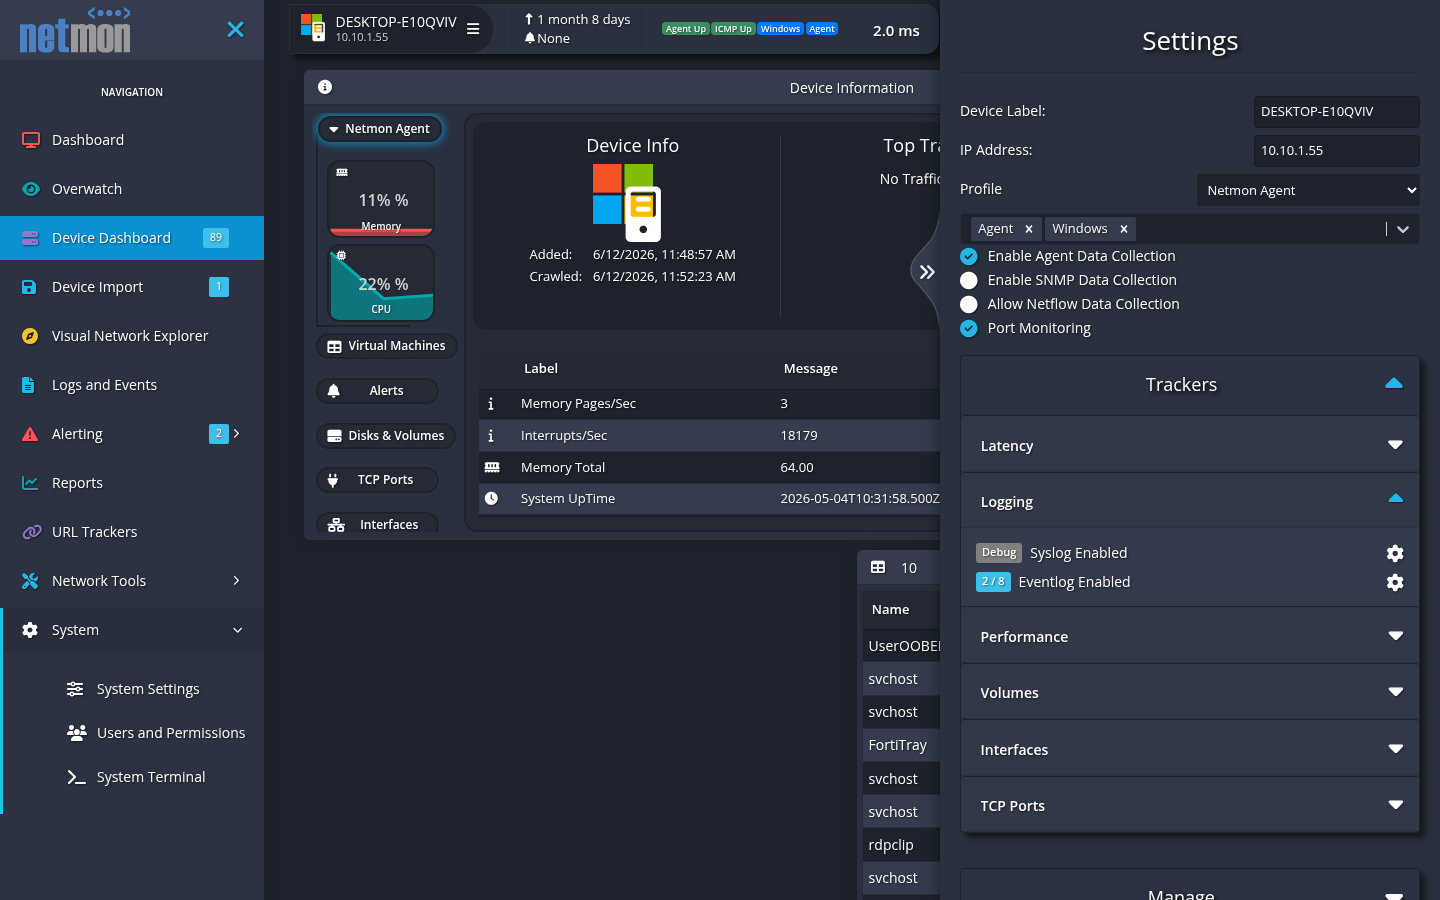
Event-log collection is tuned per device, from the device’s Settings pane: expand Logging and open the configuration gear on Eventlog Enabled.
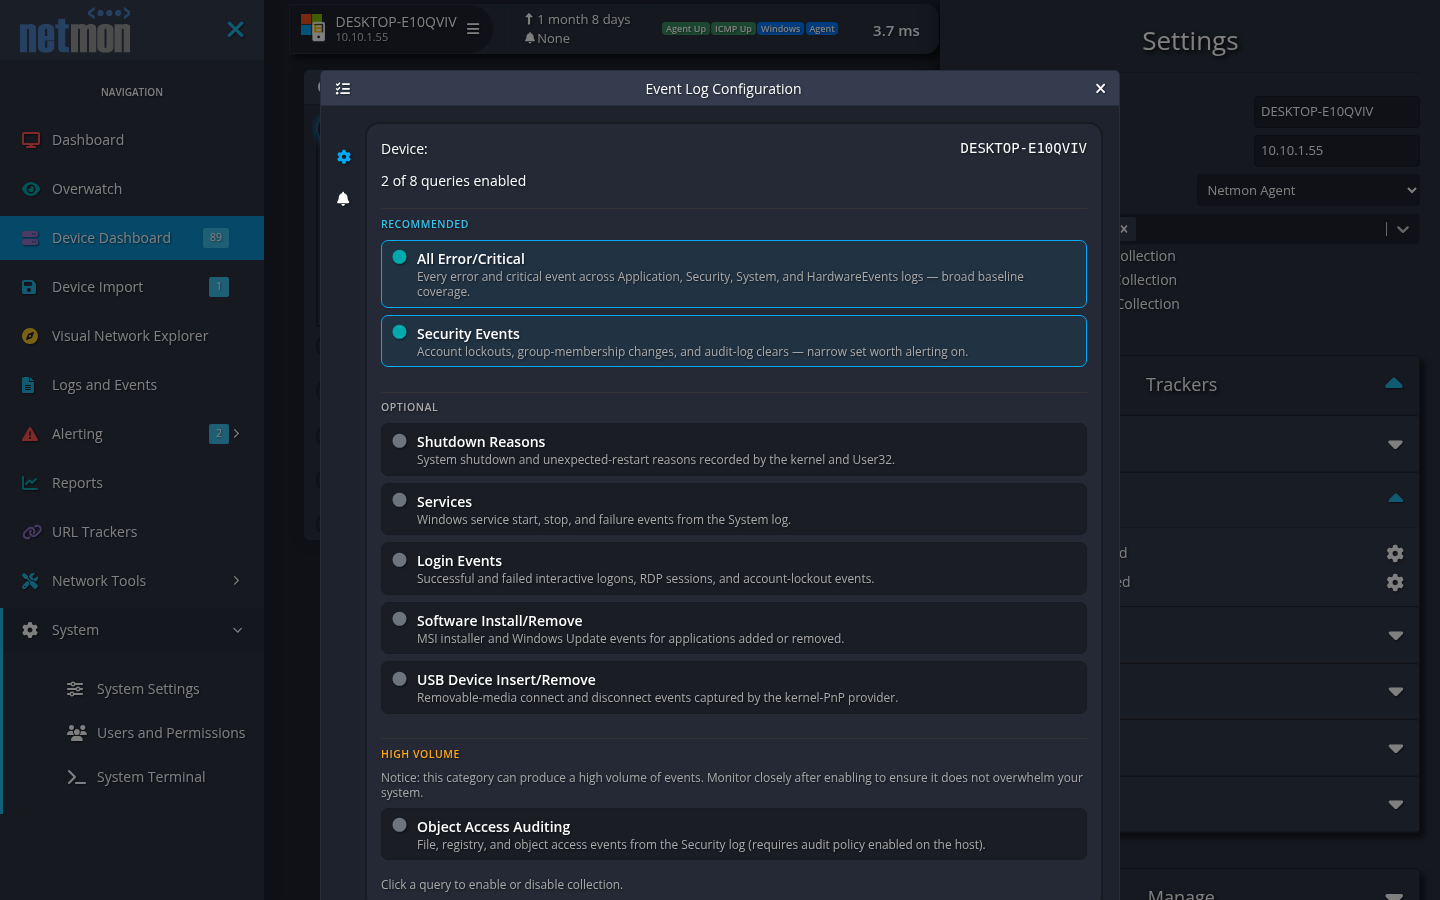
The dialog offers a curated set of query categories — two recommended ones every host should run (All Error/Critical and Login Events, enabled on new agent devices by default), optional categories for shutdown reasons, service events, security events, software install/remove, and USB device insert/remove, and a high-volume tier (Object Access Auditing) flagged with a caution, because it can produce a flood. Click a category to enable or disable it; the pane shows how many of the categories are live at a glance.
Security Events (account changes, group membership, lockouts, audit-policy changes) is an optional category, not a default — enable it where you want that audit trail. Like Object Access Auditing, some categories only produce data once the matching Windows audit policy is turned on; the dialog’s per-category description says which.
Keeping agents current
When a newer agent installer is staged on the appliance, enrolled agents learn of it at check-in, and the tray badges an Install update action. The update downloads, verifies, and installs only when a person with administrative rights on that host approves the elevation prompt — the agent service never installs software by itself, by design. Fleet deployment via your normal software-distribution channel remains the right tool for large estates; the in-product path covers the long tail.